Easy Black Cat Halloween Craft for Kids
Looking for a simple Halloween craft that’s more cute than spooky? This easy black cat craft is a fun way to get creative with the kids using a few basic supplies you may already have at home.
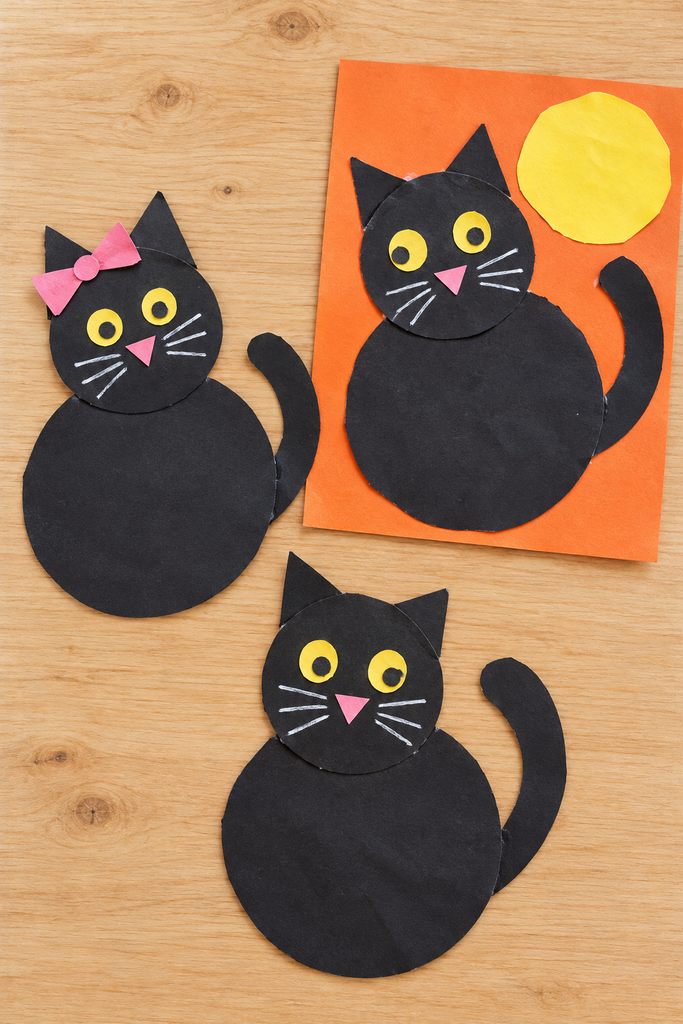
With construction paper, scissors, and a little glue, kids can make their own Halloween cat to display on the fridge, add to a classroom bulletin board, or hang alongside their favorite seasonal decorations. Each cat can have its own personality, too—give it big eyes, silly whiskers, or a colorful bow!
Supplies You’ll Need
- Black construction paper or cardstock
- Yellow construction paper
- Pink construction paper
- White crayon or white paint marker
- Black marker
- Glue stick or school glue
- Scissors
- Pencil
- Two round objects to trace, such as a bowl and a cup
Optional: A piece of colored paper for the background, ribbon for a bow, or string for hanging.
How to Make a Black Cat Halloween Craft
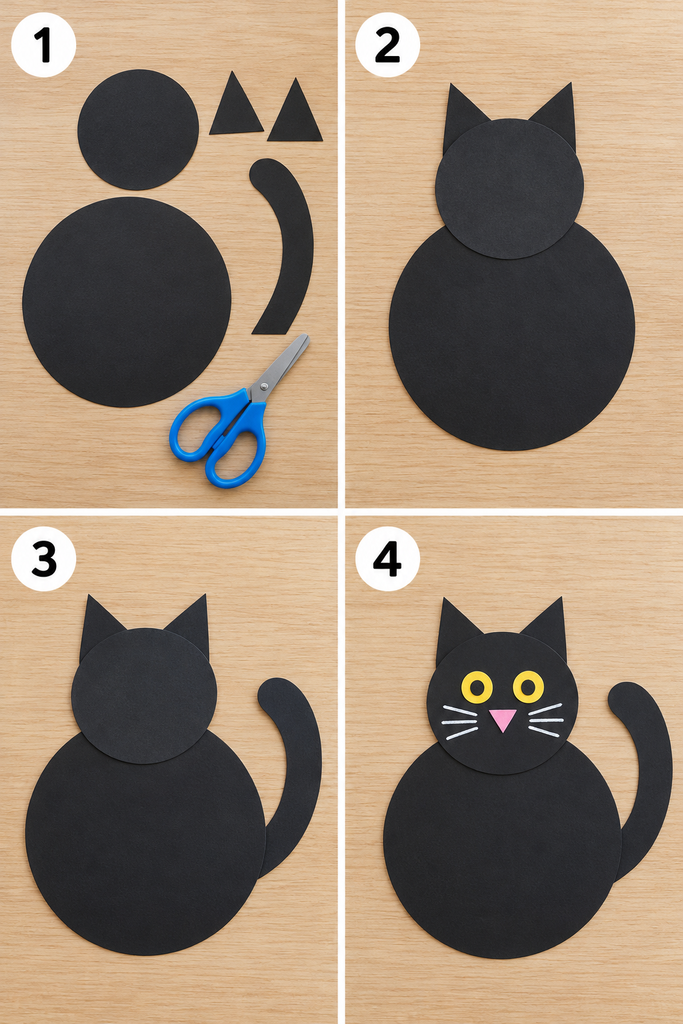
Step 1: Cut out the cat shapes
Trace one large circle onto black paper for the cat’s body and one smaller circle for its head. Cut out both circles.
Next, cut out two black triangles for the ears and a long, curved strip for the tail. The shapes don’t have to be perfect—that’s part of the fun!
Tip: A small bowl works well for the body, while a cup or jar lid can be used for the head.
Step 2: Assemble the head and body
Place the smaller circle over the top edge of the larger circle, overlapping them slightly. Glue the head in place.
Glue the two triangle ears behind the top of the head, with their points facing upward.
Step 3: Add the tail
Glue one end of the curved black paper strip behind the side of the cat’s body. Let the rest of the tail curl upward.
Step 4: Give your cat a face
Cut two small circles from yellow paper and glue them onto the head for eyes. Add black pupils with a marker.
Cut a small triangle from pink paper and glue it below the eyes for a nose. Finish the face by drawing whiskers with a white crayon or paint marker.
Let the glue dry, and your black cat is ready to display!
Fun Ways to Customize Your Black Cat
Once the basic cat is assembled, let the kids make it their own. Here are a few easy ideas:
- Add a bow: Glue a small paper or ribbon bow under the cat’s chin.
- Make a Halloween scene: Glue the cat onto orange or purple paper and add a paper moon, stars, pumpkins, or bats.
- Create a whole cat family: Use different sizes of circles to make a big cat and a few kittens.
- Turn it into a decoration: Punch a hole at the top and add a loop of string for hanging.
- Add a name: Write your cat’s name on the background or on a little paper collar.
Tips for Crafting With Younger Kids
Younger children may enjoy putting the pieces together while an adult or older child handles some of the cutting. You can also cut the shapes ahead of time and set them out as a simple craft station for a Halloween party or classroom activity.
If you’re using school glue or a paint marker, allow a little extra drying time before hanging your finished creation.
A Cute and Easy Halloween Activity
This black cat Halloween craft is an easy way to spend a cozy fall afternoon together. Make one to brighten up the fridge, or create a whole collection of colorful, silly cats to decorate your home for Halloween!
Have you made a black cat craft with your kids? Share your favorite Halloween crafting ideas in the comments!