3 Easy Christmas Crafts for Kids to Make at Home
Christmas crafts don’t need a long shopping list or complicated instructions to be fun. Sometimes a paper plate, construction paper, and a little glue are enough to keep kids happily creating—and give you something sweet to display through December.
These three easy Christmas crafts for kids include a paper plate reindeer with handprint antlers, a fluffy cotton-ball snowman, and a paper-chain countdown to Christmas. They’re simple to personalize, and you can make them with supplies you may already have tucked into your craft drawer.
Choose one for an afternoon activity or spread them out over a few days. Younger children can help with painting, arranging, and gluing while an adult handles any tricky cutting.
1. Paper Plate Reindeer With Handprint Antlers
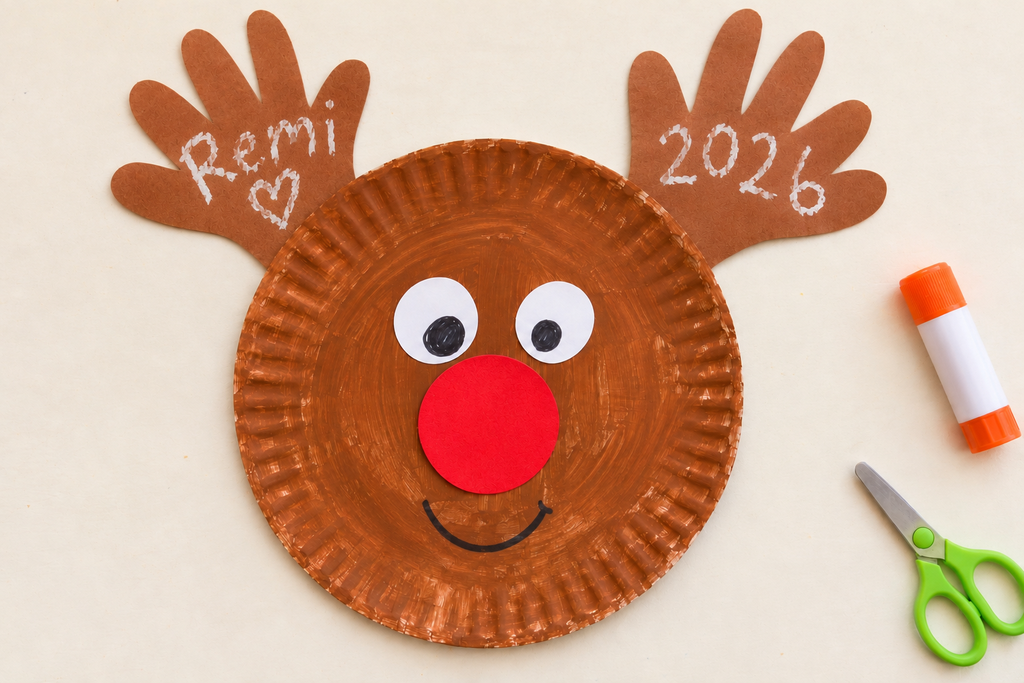
This cheerful reindeer doubles as a little handprint keepsake. The antlers give every child’s creation its own personality, and the big red nose makes the finished face especially cute.
Supplies
- One paper plate
- Brown washable paint and a paintbrush
- Brown, white, and red construction paper
- Black marker
- Glue
- Child-safe scissors
- Pencil
How to Make It
- Paint the face. Cover the front of the paper plate with brown paint and let it dry completely.
- Trace the antlers. Trace your child’s hands onto brown construction paper with fingers spread apart. Cut out both handprints, leaving a little wrist area for attaching them.
- Attach the antlers. Glue the wrist portions to the back of the plate so the fingers peek above the top edge.
- Add the eyes. Cut two white circles or ovals and draw black pupils on them. Glue them onto the plate.
- Finish the face. Cut a red paper circle for the nose and glue it below the eyes. Draw a small smile underneath.
Write your child’s name and the year on the back before displaying it. You can prop the reindeer on a shelf or attach a hanging loop once the glue has dried.
An easy variation: Skip the paint and cover the plate with torn pieces of brown paper. Kids can help tear the pieces and arrange them into a textured reindeer face.
2. Fluffy Cotton-Ball Snowman
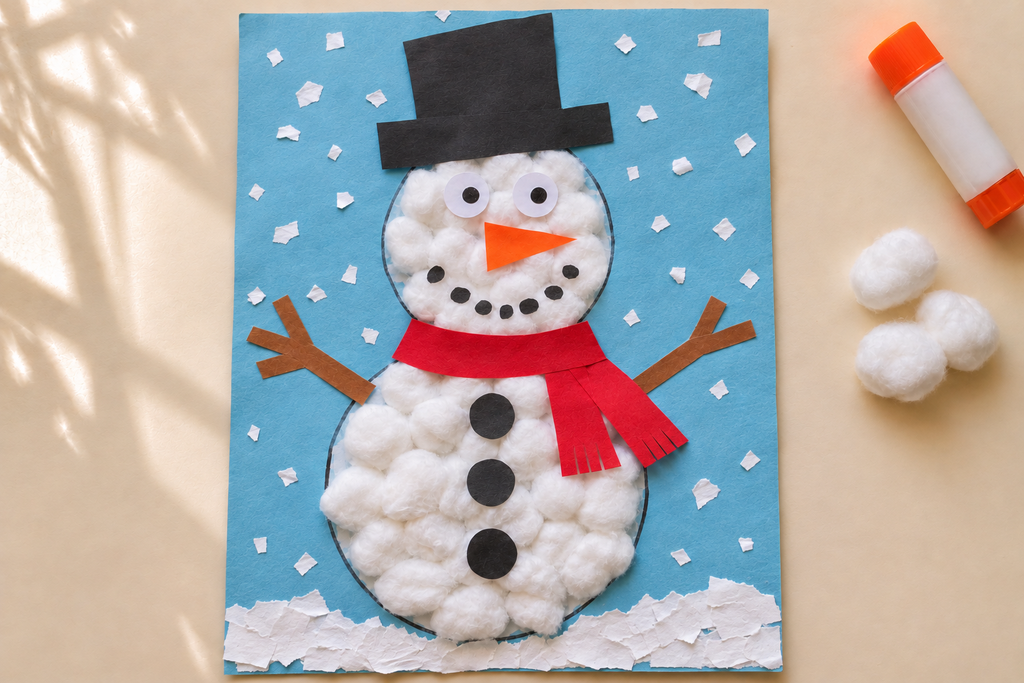
This snowman brings a little winter fun indoors without needing actual snow. Cotton balls give it a soft, fluffy texture, while paper accessories let kids choose their own hat, scarf, and expression.
Supplies
- Blue construction paper or cardstock
- Cotton balls
- White school glue
- Black, white, orange, red, and brown construction paper
- Pencil and black marker
- Child-safe scissors
- Two round objects to trace, such as a small bowl and a cup
How to Make It
- Draw the snowman. Trace a larger circle on the lower half of the blue paper and a smaller circle directly above it for the head.
- Add the cotton balls. Spread a thin layer of glue inside the circles. Press cotton balls into place, keeping them mostly within the outlines.
- Make the accessories. Cut out a black hat, orange triangle nose, red scarf, and brown twig-shaped arms. Cut three black paper circles for buttons.
- Create the face. Draw pupils on two small white paper circles. For the smile, draw black dots along a curved strip of white paper.
- Dress the snowman. Glue the face and accessories into place. A little extra school glue will help the paper pieces stick to the cotton.
- Create snow. Cut out tiny white pieces of paper to make snow all.
Allow the snowman to dry flat before hanging it. Cardstock is helpful if you have it because it supports the cotton balls better than thin paper.
Make it their own: Let kids choose a patterned scarf, a different hat, or a snowy background. They can add falling snow with a white crayon before gluing down the cotton balls.
3. Christmas Countdown Paper Garland
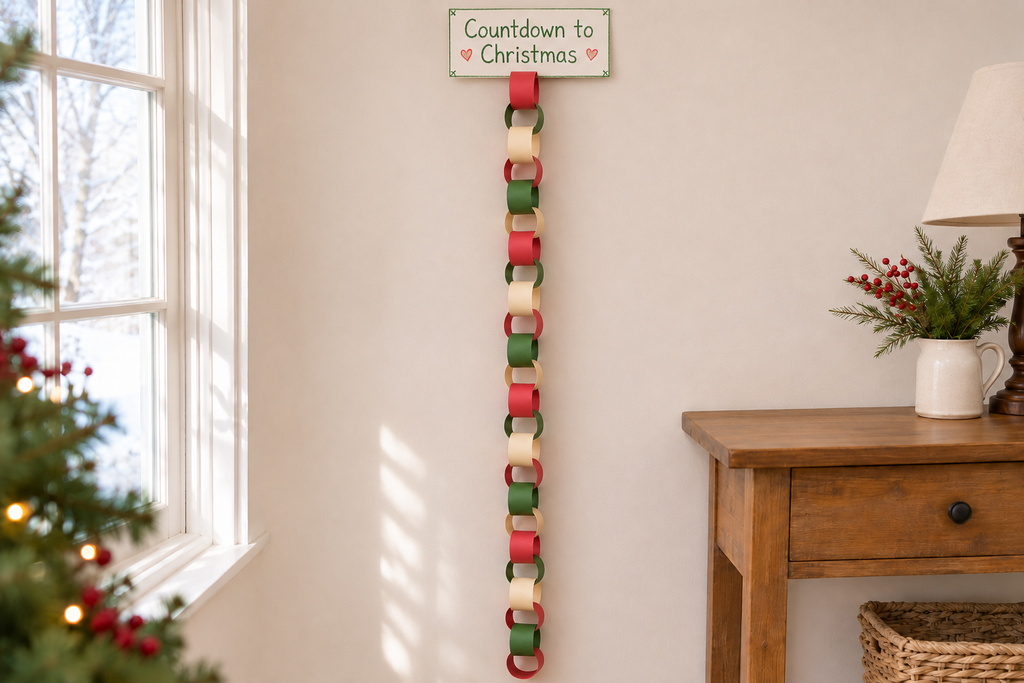
A paper-chain garland gives kids something they can make and use throughout December. Each day, removing one loop makes the wait for Christmas a little easier to picture.
Supplies
- Construction paper or wired velvet ribbon in two or three colors
- Ruler and pencil
- Child-safe scissors
- Glue stick or tape
- A small piece of cardstock for a heading
- Marker
How to Make It
- Choose your countdown. Make one loop for each day you plan to count. For example, use 24 loops if you’ll remove one each evening from December 1 through Christmas Eve.
- Cut the strips. Cut construction paper or ribbon into strips approximately 1 inch wide and 8 inches long.
- Make the first loop. Curve one strip into a circle, overlap the ends, and glue or tape them together.
- Build the chain. Thread the next strip through the first loop before joining its ends. Continue until you have the number of loops you need.
- Add a heading. Write “Countdown to Christmas” on cardstock and attach the top loop to it.
- Display the garland. Hang it where your child can reach it with your help, then remove one loop each day.
Alternate red, green, and cream for a traditional Christmas look, or let kids choose their favorite colors.
Add a little extra fun: Write a simple activity inside a few loops before assembling the chain. Ideas include reading a Christmas book, making hot chocolate, calling a grandparent, or taking a walk to look at lights.
A Few Tips for an Easier Craft Afternoon
Cut the smaller accessories ahead of time if you’re crafting with younger children. Setting out just the supplies needed for one project can also keep the table from becoming overwhelming.
Use washable paint and age-appropriate scissors, supervise cutting, and keep small paper pieces and cotton balls away from children who still put objects in their mouths. School glue and glue sticks are enough for these projects, so there’s no need for hot glue.
None of these crafts requires a printed template. Handprints become antlers, household objects help create snowman circles, and the remaining pieces are simple shapes you can sketch directly onto paper.
Leave room for crooked smiles, uneven scarves, and unexpected color choices. Those small details are what make homemade Christmas decorations worth saving.